Showing posts with label DIY. Show all posts

Thursday, February 12, 2015

DIY Heart Shaped Crayons

It’s almost Valentine’s Day and I wanted to share the Valentine’s Day treats Rowen and I made for friends and family last weekend!  A few weeks ago I did this post on no candy valentines for kids, and when I saw the adorable muffin tin crayons I knew we had to make them!  

Materials needed: (sorry I was so excited to start our fun that I forgot to take a picture of my supplies)
  • 24 pack of Crayola Crayons (a 24 pack easily makes 6 hearts)
  • Silicone baking cups (bought mine at Michaels)
  • Metal Baking sheet
  • Aluminum Foil
Start by preheating your oven to 250 degrees

Second, peel off the wrappers from each Crayon.  This part was actually trickier than I expected and ended up having to use an x-acto knife.

Third, break apart the crayons into small pieces (we put a variety of colors in each cup) and place about 15-20 pieces in each baking cup.  This was Rowen’s favorite part!


Once all your baking cups are full, place them on a metal baking sheet lined with aluminum foil (the aluminum foil is important)


Place the baking sheet inside the oven on the top rack for 10-12 minutes (or until the crayons are melted).

Remove from heat.  Try to be as steady as possible when you do this as you don’t want your molds to move around too much.  Place on top of  the stove or in refrigerator for 4-5 hours to cool.


Once cooled, slowly peel the baking cup away from your molds.


Ta Da!  Perfectly shaped multi-colored heart crayons…now you are ready to color!

I held a few crayons back for Rowen to play with and put the rest inside clear cellophane bags paired with a cute Dora the Explorer valentine card for each of Rowen’s friends!  


These crayons make the perfect Valentine's Day treats AND would also make awesome party favors at birthday parties!  We will definitely be making them again!

Shared with:
Happy Kids, Inc.

Thursday, January 29, 2015

DIY: Easy Bathroom Update

As I've said before, slowly but surely, Ryan and I are chipping away on our (ahem, my) “to do” list for the house. One of the top items on my list was to frame the boring builder’s grade mirrors in all three of our bathrooms.

I’ve hated our mirrors since day one. We had these same boring mirrors in our previous house, too, but it never even occurred to me how easy it might be to spruce them up!

Now, depending on your skill level with power tools (we don’t even own a saw), this project can be as simple or as complex as you want to make it. We opted for the easy way out, which meant no miter saw needed!

This was the blank canvas we started with…your basic builder’s grade mirror, nothing special.


And this was the end result!


Interested to see how we did it?  Check it out...

Materials Needed:
  • Four corner blocks 
  • Molding (we used baseboard trim) 
  • Liquid Nails (adheres to mirrors) 
  • Painter’s Tape 
  • Wood stain/paint (we used paint) 
  • Paintbrush 
First: Measure your mirror so you know what size to cut your moldings (don’t forget to take into consideration the four corner blocks, which take up roughly 3 inches of your mirror)


Second: Paint/stain your molding (if it's rough you may want to sand it down first).


Third: Put it all together! Use your glue and begin by placing one of your corner pieces onto the mirror first. Hold in place for a few minutes to ensure it dries. Next, glue the on molding.  Helpful tip: you’ll want a second set of hands for this part. 


Fourth: Once all of your molding is glued and up, secure it with painter’s tape for 8-12 hours just to be sure nothing moves out of place.

To accompany the mirror, Ryan also added hardware to the cabinets...


 …and installed a new, bronze faucet!


I absolutely love the way everything turned out!  The best part is, the entire thing cost us under $100 (the molding and glue were only about $30)!

It was so much cheaper than I had expected and so easy! I can’t wait to get started on the other two mirrors in the house!

Shared with:

All Kinds of Things

Friday, January 16, 2015

Five No Candy Valentine Ideas


Can you believe Valentine’s Day is right around the corner?!   I don’t know about you, but we are STILL eating Halloween candy at my house.  Between our giant ghost bowl full of candy and all the sugar I consumed at Christmas, the thought of Valentine’s Day candy literally makes me ill!  Unlike last year, this year, I plan to do something non-edible as treats for Rowen’s friends at daycare.  I am LOVING these five, fun ideas I found online so I had to share…check it out!


All of these are SO darn cute...especially number five, I have to try it!


Shared with:

Time for Mom

All Kinds of Things


Tuesday, September 16, 2014

DIY Toddler Busy Box

I'm excited to be linking up with one of my favorite blogs, Schue Love today for a DIY Toddler Busy Box activity!  

This toddler activity was first presented to my daughter via her daycare provider and ever since, it’s been a go to activity for us at home, too!    

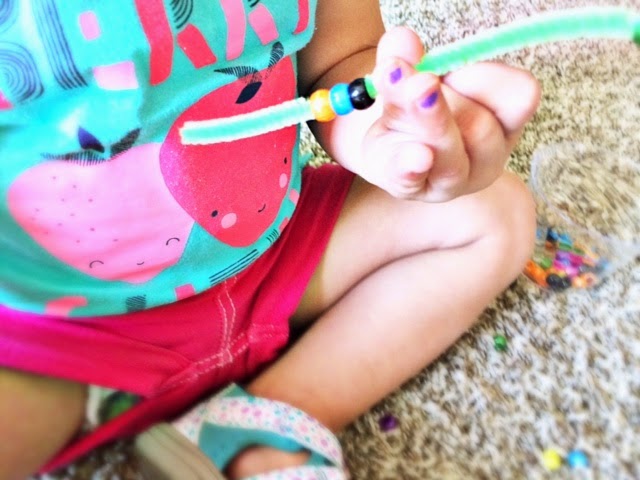
For this, all you need are craft beads and pipe cleaners…easy enough, right!?


Just have your little one string the beads one by one onto the pipe cleaner!  Rowen's favorite things to create are her very own princess crowns, bracelets and necklaces!  Oooh la-la! 


I highly recommend this activity as it's great for developing fine motor skills!  However, I will say, if your child is young you will want to make sure to monitor them while playing as the pieces are small and can easily be put into the mouths of little ones (side note, the larger foam beads work great, too!).

While I'm at it, check out these adorable Halloween crafts using beads and pipe cleaners - we're totally going to have to try these!

Halloween Spider: 


Enjoy!

Wednesday, September 10, 2014

Do you WASHI?


Normally I don’t carry a protective case on my iPhone.  Reason being, I usually run with my phone in an arm band, and taking it out of a pesky case so it fit always seemed like more work than it was worth.  Until the other night that is, when I dropped my phone on the tile floor and cracked the heck out of the screen.  Lesson learned, I guess.  Since then I’ve been on the hunt for a case.  Most of the cases I want cost between $20 and $30, which I think is ridiculous.  

Enter Washi Tape.  


Apparently Washi Tape has been around for quite sometime, but for one reason or another I’ve only recently discovered it!  I love all the bright colors and the endless amount of things you can decorate with it…including a cell phone case!

I have to say, I love the two cases I made – they turned out cute and were a fraction of the price!


Supplies Needed:
  • Clear or solid color cell phone case (found mine in the dollar bin at Target)
  • Washi Tape
  • X-acto Knife
  • Mod Podge
  • Paint Brush 

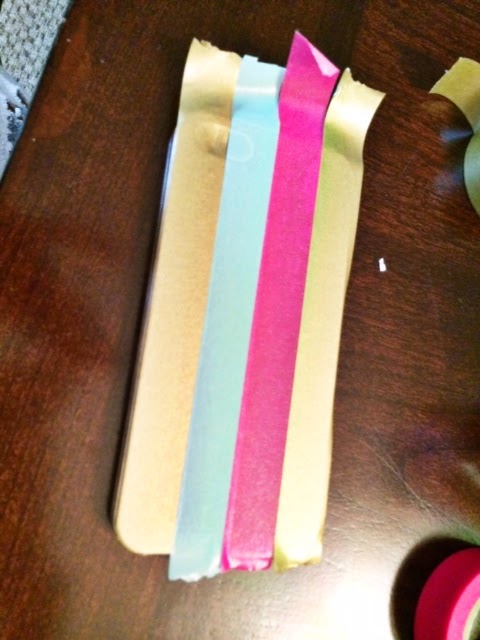
Start by taking your Washi Tape and laying it down in strips on the back of the case (be sure to line up the tape as straight as possible)


Trim the edges and the hole for the camera with your x-acto knife.


Next you’ll want to seal it with a thin layer of Mod Podge so the tape won't scratch or peel. 


Wa-la...so easy and so inexpensive! 


And while I'm at it, here are a few other cute ways to Washi - check it out...

Washi Tape Letters: 


Keyboard Art:

Organize with Washi Tape:


Shared with:


Monday, July 28, 2014

Rowen's Elephant Party!

Our sweet, silly, little girl turned two years old last Sunday! 


There is not much I love more in this world than a birthday party, especially a well-planned themed party!  For the past month I’ve been planning an elephant theme for her second birthday!  I wanted to incorporate some of Rowen’s favorite things at her party, which just happened to include elephants, cake, cookies, hot dogs, and swimming!


Here are a few shots of all the cuteness…

The invitations:  If you've been following my blog, you know that I also do a little graphic design on the side of my everyday job.  Well, this summer I have been slammed with weddings I am designing for and (as bad as it sounds) just didn't have the time to do Rowen’s invitations, too.  So instead, I thought I’d go online and give another designer a chance at some business!  Within minutes of looking, I found these adorable invitations and just couldn't pass them up! 


Party Location:  Unlike last year, we decided it would be much easier to host the party in our own home.  However, the main floor of our house wasn't big enough to comfortably hold 30+ people so we decided to cross our fingers for good weather and have the majority of the party outside in the backyard.  It was hot out that day, but luckily there was a good breeze to help keep everyone cool!


The Guests: The guest list included aunts, uncles, cousins, grandparents, great grandparents and a few of Rowen’s little friends from daycare!

The Decor:  To keep it girly, I went with a teal, pink and gray color palate.  A majority of the decorations inside were focused on and around the cake table.  To start, I purchased cheap gray tablecloths and hung an adorable pink, gray and teal banner that read “Happy Birthday”.  I also utilized the chicken wire frame (a DIY project I did a few months ago) we have hanging on our dining room wall as the backdrop to display a “number 2” sign I made along with some recent pictures of the birthday girl!    


Scattered throughout the main floor of the house were teal, pink and gray balloons and few gray pom-poms.  I also hung this adorable elephant garland over the fireplace.


Outside in the front yard, the guests were greeted at door with this cute sign, which matched the invitations. 


Out back, where the majority of the party was being held, were a few tables decorated with gray tablecloths and a jar of peanuts as centerpieces.  We also hung a few paper lanterns, too!  For the kids at the party, we busted out the inflatable pool and filled it with lots of fun toys as entertainment – so easy!


The Food:  It was Ryan’s idea to do a hot dog bar!  I was originally just thinking of doing a grill out, but when Ryan suggested his idea, I was instantly on-board!  We had a variety of different toppings, which were a hit with the guests!   


For dessert there was cake, ice cream and chocolate chip cookies!  I ordered a simple marble flavored sheet cake designed to match her invitations…so cute!


The afternoon was spent eating, and opening gifts!


It was a great day shared with close family and a few of Ro's spunky little friends!  Rowen is truly a blessed little girl! 


Shared with: